
Custom HTML Dashboard
Hello,
i was looking to create a custom Dashboard in Ninox to have a clear overview over some important KPIs and also allow controllers to get a quick view at key data.
With the help from this great community i was able to create a common dashboard with the form view, but for me personally, the styling and layout options in Ninox are too limited to create a clean and modern dashboard view. The current options are totally okay, but i was looking for something more extended.
Today i want to share my custom HTML dashboard with you and i hope the information will be useful for your own projects.
Here is a screenshot of the dashboard:

In its current version it features card style statistic boxes and a custom table.
The entire dashboard is only one formula field.
So here is what i´ve done:
At first, i needed a html layout and css styling. If you dont like to code it yourself, you can google for a free html dashboard generator like i did. It allowed me to build a sample dashboard by drag and drop and afterwards it let me export the html and css files. (i used loopple . com)
After you got your code now, open the files in your favorite code editor, i prefer Visual Studio Code.
Open the index.html file that contains your dashboard html layout. Remove any code that you dont want as well as any scripts that may be included, we don´t need them.
At the very end of the file add <style> </style>
Now copy all the contents from the .css file(s) and paste them in between the style tags. Now you have all the code in one file.
The next step is to prepare the code for use i the Ninox Formula field.
In Visual Studio Code, click on the search Icon in the sidebar and search for " and replace it with ""
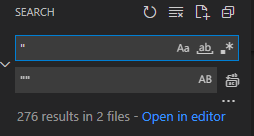
Click replace all and afterwards your code should look like this:

That´s all. Now press Ctrl + A and copy all of the edited code.
Go to your Ninox Dashboard Table, create a Form View and a new Formula Field.
To add your code, wrap it inside the html() function like below:
html(" paste your code here ")Save it, and you should now already see your new dashboard.
In the next step, we will bring it to life:
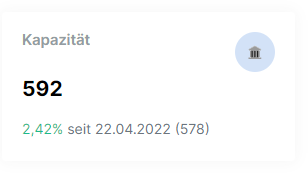
To add data to your dashboard, you need to chain in the data you like. Here is an example of how to place data inside one of the card boxes:
Create your variable first, don`t place the code directly into the code. You will get lost if you edit it later.
let variable := sum((select 'Table1' where 'Status' = 1 and 'YXZ' = 1).'YourValue');
Now chain it into the html on the right place. If you used a generator for your html, you probably have some sample text for orientation.
Remove the sample text and replace it with your variable like this:
<h1 class=""mt-1 mb-3"">" + variable + "</h1>
   <div class=""mb-0"">
      <span class=""" + if percent > 0 then "text-success" else "text-danger" end + """> <i class=""mdi mdi-arrow-bottom-right""></i>" + round(percent, 2) + "%" + "</span>
         <span class=""text-muted"">seit" + last_stat_date + " (" + last_stat_data + ")" + "</span>
Well, in this example i put an if function directly inside the code :).
What`s important to do here is to always place your code like this:
" + your code/variable + "End the html with a quote and begin it with a quote after the code, this way you won´t break your html.
In the example above i not only placed my data inside the card box, i also added an if statement that changes the css class to either show a green text for positive trend or red text for a negative trend:
From now on, you are free to extend it in every way you like. For example with a auto generated table:
[...]
<tbody>"

 + for i in variable do
     "<tr>
        <th scope=""row"">" + i.Value1 + "</th>
        <td>" + count(i.Value2) + "</td>
        <td>" + i.Value3 + "</td>
        <td>" + i.Value4 + "</td>
        <td>" + i.Value5 + "</td>
      </tr>"
   end +

"</tbody>
[...]
That´s it, now you have your very own and customized dashboard 🎉
PS: You can´t only do dashboards like this, i also used it to create branded email templates for example.
I hope this tutorial will help you in some way to get the best out of your Ninox experience.
If you have any additions or better solutions, please share them. Im not an expert by any means and learned everything i did in Ninox by trial and error and with the help of this community.
Cheers!
37 replies
-
Hi Alex, excuse me, if I bother too much, but there's one more issue I got stucked. I believe its somewhere in CSS too, but I cant find it at all and I hope you may know where this piece of code may be.
As you can see in image the buttons Feld löschen and OK are outside the box.
Do you have an idea where to change that?
Thnx a lot in advanced!
Kruna
-
Kruna
https://forum.ninox.de/t/x2h7y97/html-tabelle-anlegen-und-befullen
Here there are HTLM Table is in the Germán Forum. Good for Work with it.
-
Hi, I'm a bit late to the party here but hoping someone can help.
Whenever I place HTML in the formula field I am always left with the default formula styles around the outside... is this normal? Because from the screen shots on this thread, I shouldn't have that.
Thanks
Craig

Content aside
-
8
Likes
- 2 yrs agoLast active
- 37Replies
- 2892Views
-
11
Following